

On many projects, window automation is one of the last things to be resolved. The facade is detailed, the window system is selected and the mechanical strategy is set. Only then does someone ask how the high-level windows are actually going to open.
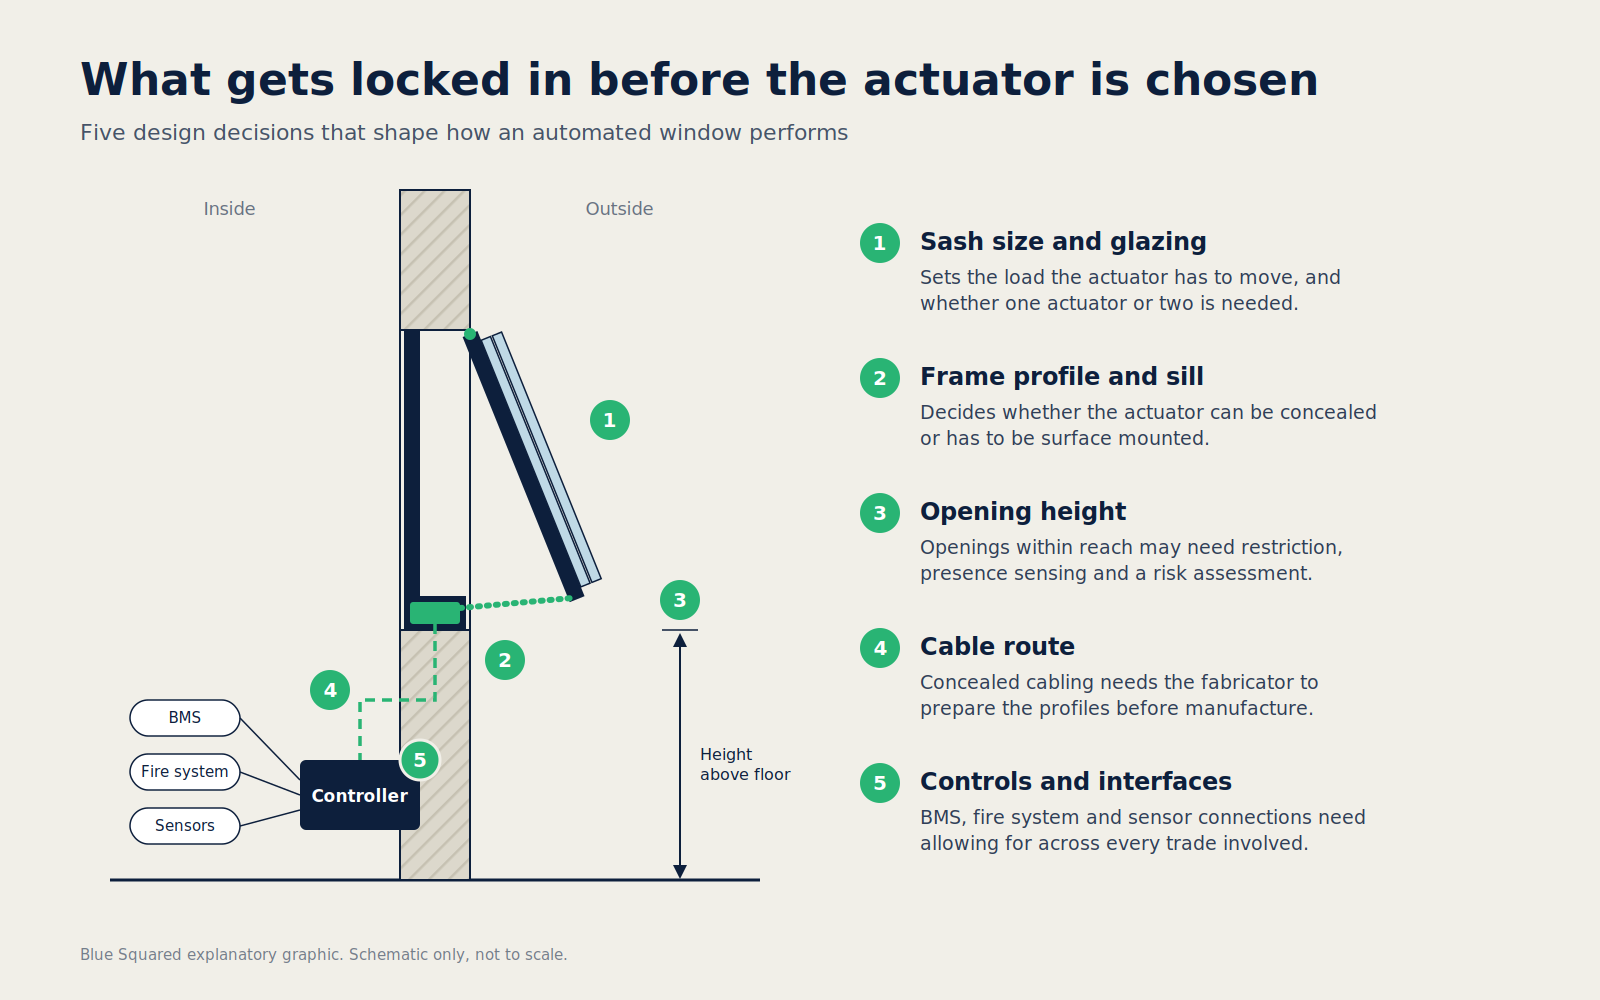
By that point, most of the decisions that determine whether an automated window performs well have already been made. The sash size and glazing set the load the actuator has to move. The frame profile and sill detail decide whether the actuator can be concealed. The position of the opening decides whether it needs restriction or safety sensing. Cable routes, control logic and the interfaces with the BMS and fire system have either been allowed for or they haven’t.
None of those decisions are made with the actuator in mind, but every one of them constrains what the actuator can do. So the most important decision in a window automation project usually isn’t which actuator to use. It’s when the automation is brought into the design.
This article looks at what gets locked in early, why it matters for ventilation and smoke-control performance, and what changes when automated openings are specified at design stage rather than resolved after the facade is finished.
The actuator is chosen from the window
An automated window is a system made up of the window or louvre, the actuator, its brackets, the controls and sensors, and the building systems it connects to. The actuator is the visible part, but it’s selected from the window rather than from a catalogue.
Selection is a calculation. It starts with the opening type and direction, the sash dimensions, whether the unit is single or double glazed, the glass thickness and how far the sash needs to open. From those, the sash weight and required stroke are worked out and a suitable actuator is proposed. Wide or heavy sashes are often better served by two actuators working at the quarter points than by one larger unit at the centre. We cover actuator selection and free area calculation in more detail in Window Actuators Explained.
Every one of those inputs is a design decision made by the architect or facade team. If they’re made without the automation in mind, actuator selection becomes a matter of making the best of what’s been drawn. Sometimes that’s straightforward. Sometimes it means a larger or more visible actuator than the design intended. It can mean extra actuators on a sash that was never detailed for them, or an opening that can’t quite achieve the free area the ventilation strategy depends on.
What gets locked in before the automation is considered
Frame profile and sill detail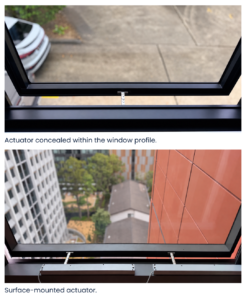
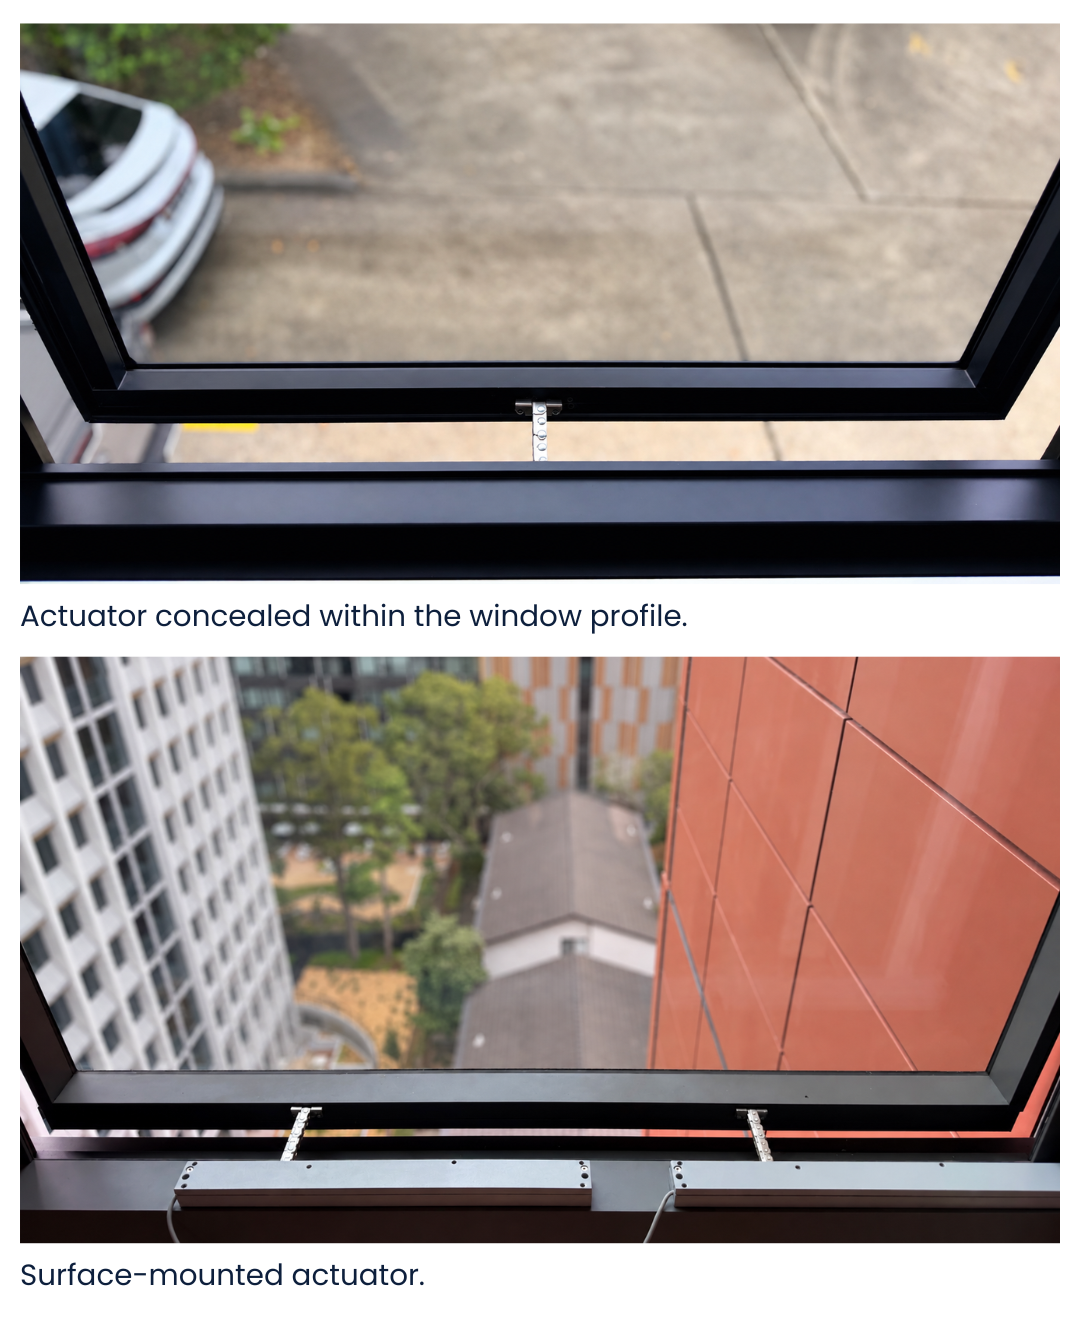
Whether an actuator can be concealed depends on the window system. Some proprietary aluminium window systems have an internal sill space that accommodates a chain actuator without modification. Others don’t, and the actuator ends up surface mounted.
The chain stroke matters here too. A longer chain needs larger links to maintain its integrity, which means a larger housing to conceal it when withdrawn. The window profile also uses up some of the chain’s travel just bridging the gap from the actuator’s fixing point to the sash, so the clear opening is less than the stroke itself. If a concealed, low-profile actuator is part of the design intent, the window system and actuator need to be considered together before the system is selected.
Opening position and height
Where an opening sits in the building changes the scope of the automation. High-level windows that occupants can’t reach are generally the simplest case. Low-level openings that people can reach need a different approach. That can include restricting how far the window opens, adding presence sensing that stops the window moving when someone approaches, and a risk assessment covering entrapment and safety.
Each of those affects cost, hardware and the control design. They’re much easier to allow for when the opening strategy is being set than after the window schedule has been issued.
Cable routes
Actuator cabling has to reach every opening. A window profile can often act as a concealed conduit, which avoids surface-mounted trunking. However, the window or curtain wall fabricator needs to prepare the profiles with grommets and draw wires in advance. Once the frames are fabricated, that option has usually gone. What’s left is a visible cable run that nobody drew.
Controls and interfaces
Automated openings can be controlled by wall switch, controls, app, sensor, time schedule, BMS or fire alarm signal, and often by a combination of these. Sensors for wind, rain, temperature and CO2 may all feed into the control logic. Where the system connects to a BMS, the protocol and level of integration need to be agreed with the controls contractor. Where two-way communication is used, the BMS can receive position and fault feedback rather than simply sending open and close commands.
Each of these is an interface between trades. It needs to appear in the electrical, mechanical and fire documentation, not only in the window specification.
The ventilation strategy depends on the opening delivering what was designed
A natural or mixed-mode ventilation strategy is designed around openings achieving a particular free area and operating in a particular pattern. The mechanical engineer’s calculations assume the windows will open as far and as often as the strategy needs.
Free area depends on more than the size of the window. It depends on the opening geometry, the chain stroke, and any reveal or sill that restricts the opening. It also depends on how the free area is calculated. The throat formed at the leading edge of the sash is usually the starting point, with the side triangles counted only where the strategy allows. Actuators with controllable stroke can be set to open to a specific position rather than simply running to full travel. That helps, but only if the required opening has been defined in the first place.
The control logic matters as much as the hardware. When a purge cycle runs, and how windows hand over to mechanical ventilation in a mixed-mode building, are design decisions that shape how the actuators are scheduled and how the controller talks to the BMS. When the window specification and the ventilation strategy are developed separately, the gap between them tends to appear at commissioning, which is the most expensive point to find it.
Smoke control leaves even less room for late changes
Where an automated window or louvre forms part of an engineered smoke-control strategy, its required performance, fail-safe behaviour and interface with the fire system are set by the project’s fire engineer. The product doesn’t decide these things, and they need project-specific assessment rather than assumptions carried over from another building.
Timing matters even more here. WindowMaster’s guidance on smoke vents tested to EN 12101-2 treats the declared performance as belonging to the finished vent, meaning the window and actuator together as tested, not to the actuator alone. How that European framework applies on a particular Australian project is a question for the fire engineer and certifier. The practical point holds either way: on a smoke vent, a late change to the window system, sash size or actuator is not a like-for-like swap.
Bringing the automation into the design early means the combination can be confirmed while there is still time to adjust it.
What early specification looks like in practice
Design-stage input from an automation specialist is practical rather than theoretical. On a typical project it can include:
- actuator sizing and free area calculations from the window information available
- specification wording that describes the complete system rather than a generic “motorised window operator”
- CAD files the design team can place straight into their drawings
- a view on whether a standard bracket will suit, or whether a bespoke bracket or adaptation is needed
- an approach to safety for any openings within reach
- a clear split of responsibilities between the facade contractor, electrical contractor, controls contractor and fire trades
Non-standard openings benefit most. An unusual sash, a heavy rooflight or an opening in an awkward location can be assessed for feasibility before it’s drawn into the facade, rather than after it’s been built.
The main benefit shows up at tender. When the documentation describes a coordinated system, tenderers price the same scope, and fewer gaps are left to be resolved through RFIs, variations or on site. Clear responsibility at the boundaries between trades matters most: who fixes the brackets into the frame, who runs and terminates the cabling, and who tests the interface with the fire panel or BMS.
When is early enough?
Ideally, automation input starts at concept or preliminary design, when window types and the opening strategy are being set. It should also run alongside the mechanical and fire engineers as they develop the ventilation and smoke-control strategies. At the latest, it should happen before the window system is selected and the facade details are developed, and well before tender documentation.
Complete information isn’t needed to start. Approximate window sizes, opening types, locations and the intended function of each opening are enough to begin sizing actuators and identifying the questions that need answering.
Late involvement isn’t a lost cause, but the options narrow. The same is true of work on existing buildings. Where a building already has window automation, an extension will often need its own system rather than a tie-in to the existing one, and that’s worth establishing at the outset.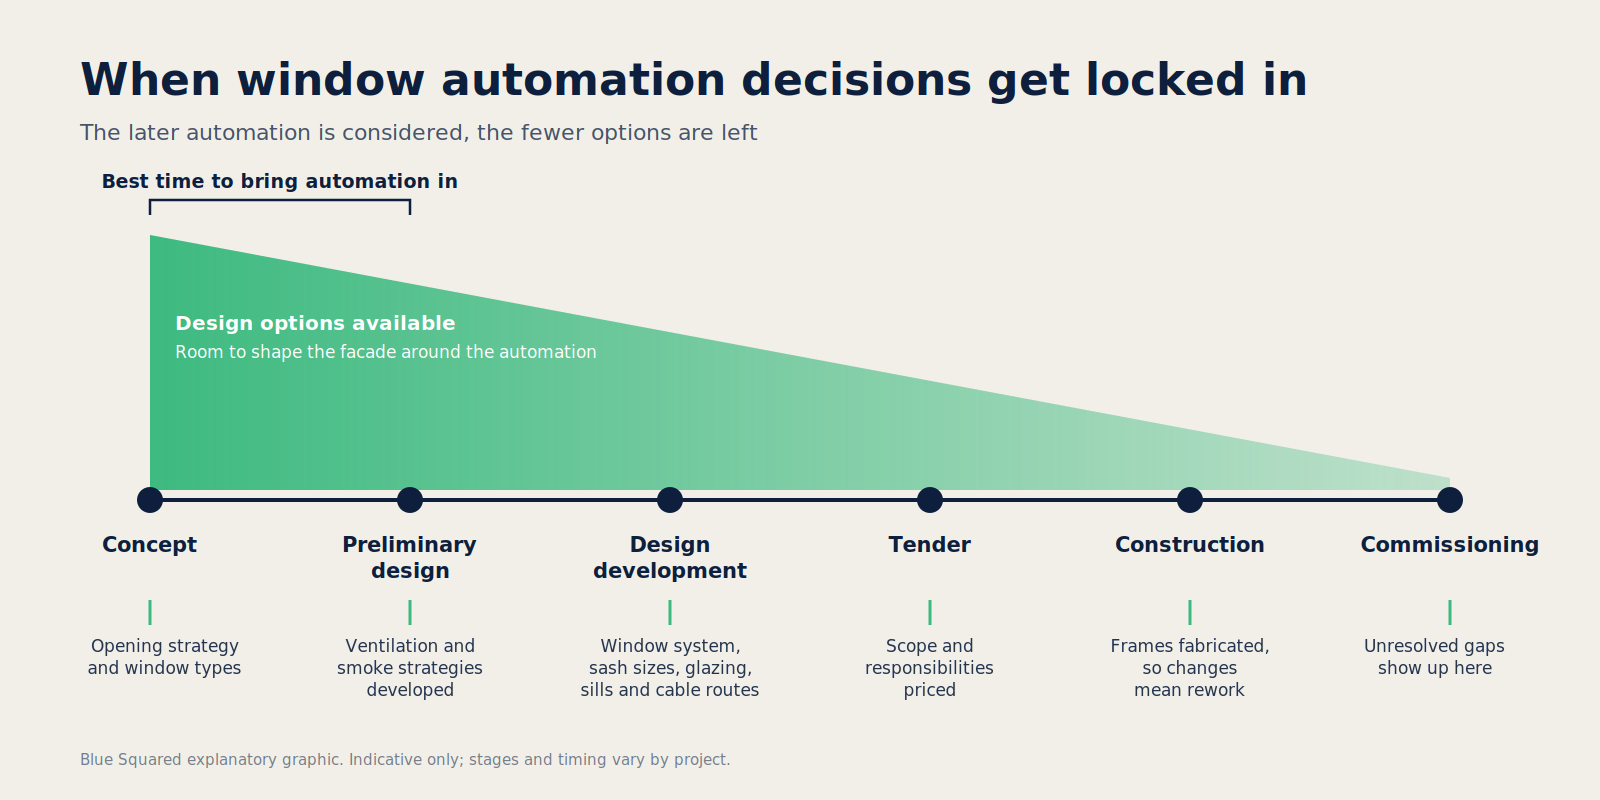
Questions to resolve before the facade is locked in
Before the window system and facade details are finalised, a design team should have answered a few questions. What are the opening type, direction, dimensions and glazing of each automated opening? What does each opening do: comfort ventilation, purge, mixed-mode operation, smoke control, or more than one of these? What free area does the strategy require, and can the chosen profile, reveal and sill achieve it? Are any openings within reach of occupants, and what restriction or sensing will they need? Will the actuators be concealed, and does the window system allow it? Where will the cabling run, and does the fabricator need to prepare the profiles? How will the system be controlled, and what are its interfaces with the BMS and fire system? Finally, which disciplines need to confirm these decisions before they’re locked in?
Conclusion
An automated window only performs as well as the decisions made around it. By the time actuator selection comes up on many projects, the sash, glazing, profile, sill, cable routes and control strategy have already been decided, often without the automation in mind. Specifying early means those decisions support the automation rather than constrain it. The result is a design that achieves its ventilation and smoke-control intent, a tender that prices a complete scope, and an installation with fewer surprises.
Blue Squared offers no-cost design-stage consultation for architects and engineers, including actuator sizing, free area calculations and specification support. If you’re working on a project with automated windows, louvres or smoke vents, get in touch early. It costs nothing and saves a lot. Contact the team at info@bluesquared.com.au.